You could recoup 86% of your costs in a basement remodel, according to the National Association of REALTORS’ 2022 Remodeling Impact Report. Not only could you receive a return on your investment when you sell your home, but that same report finds that 83% of people had a greater desire to spend time at home after completing a basement remodel.
If you’re thinking about performing a DIY basement remodel, we’re here to help. A DIY basement finish can be overwhelming at first, so here are our tips and tricks to help your project go smoothly.
Steps to a DIY Basement Finish
There are 10 steps to complete in order to turn your basement into a nice escape from the rest of your house.
- Clean it out. Many people use an unfinished basement as storage. Clear out everything to understand the space you’re working with for the remodel.
- Perform a moisture test. Basements are where many water leaks start, so before you start on any remodeling projects in this space, you’ll want to ensure there’s no moisture problems. There are three moisture tests to choose from: the plastic sheet test, relative humidity meters, or calcium chloride kits. Each will tell you in about three days if there’s any dampness in your basement. If there is any, you’ll want to take care of it before you start.
- Draw your plan. Create a scaled design of how you want the basement to look. Use specific dimensions for walls, windows, doors, and any special features like a fireplace. Define each room’s purpose, like a bathroom, storage room, or bedroom.
- Obtain necessary permits. Determine local permit and building code requirements before you start working. This includes regulations on ceiling heights and the number of exits or windows. If you’re looking to rent a dumpster for easy disposal of project debris, you might also need a permit for that.
- Install insulation. According to the U.S. Department of Energy, you can save up to 10% on total energy costs in your home and reduce unwanted air leaks by insulating the basement. Insulating the foundation walls is easily doable. It just takes some basic carpentry skills.
- Frame walls. Referring to your scaled drawing, mark out the interior wall and stud locations, then assemble the wall frame. If you’re looking to pre-wire any television or sound systems, do this while framing your walls, before installing the drywall.
- Install drywall. This step takes at least two people. Make sure each piece of drywall starts and ends in the middle of the stud.
- Choose and install flooring. There are several kinds of flooring, from tile or vinyl to carpeting. We’ll get into the different budget-friendly flooring options below.
- Choose and install the ceiling. Again, there are several different types of materials you can use for ceilings. You can also leave your ceiling exposed and paint it if you want to save money and still have a finished result.
- Paint and decorate! Lastly, paint your new space and decorate it! This is the most fun step in your DIY basement remodel process.
Tip No. 1: What to Leave to Professionals vs. What to DIY
You might want to leave some aspects of this project to the experts. This can include plumbing or electrical work, window installation, a new furnace, or radon mitigation. All the work you can complete includes the above-mentioned steps: insulation, framing, drywall, and painting. When it comes to trim, if you’re painting the baseboards the same color as the wall, install it before painting the drywall. If you’re painting the trim work a different color, paint it before installing it.
Tip No. 2: Necessary Tools
Before you get started, make sure you have all the necessary tools to ensure your remodel goes smoothly. Doing so will minimize your trips to the hardware store. Family Handyman recommends these tools:
- Caulk gun
- Chalk line
- Circular saw
- Drill bit set
- Drill/driver – cordless
- Dust mask
- Hammer
- Hammer drill
- Hearing protection
- Level
- Safety glasses
- Sawhorses
- Speed square
- Stepladder
- Tape measure
- Toolbelt
- Utility knife
Tip No. 3: Budget-Friendly Flooring Options
There are several different budget-friendly flooring options for your basement. First, paint the existing cement from the foundation and add area rugs to key spaces. Then, if you want padded flooring, you can add foam mats to areas designated for a playroom or gym. Vinyl is another option. You can find some vinyl for under $1 per square foot and it’s waterproof.
Tip No. 4: Budget-Friendly Ceilings
As mentioned above, leaving the ceiling exposed is one budget-friendly option. Others include sheetrock or ceiling tiles. Ceiling tiles can be great for easy water or sewer pipe access but can be challenging to install.
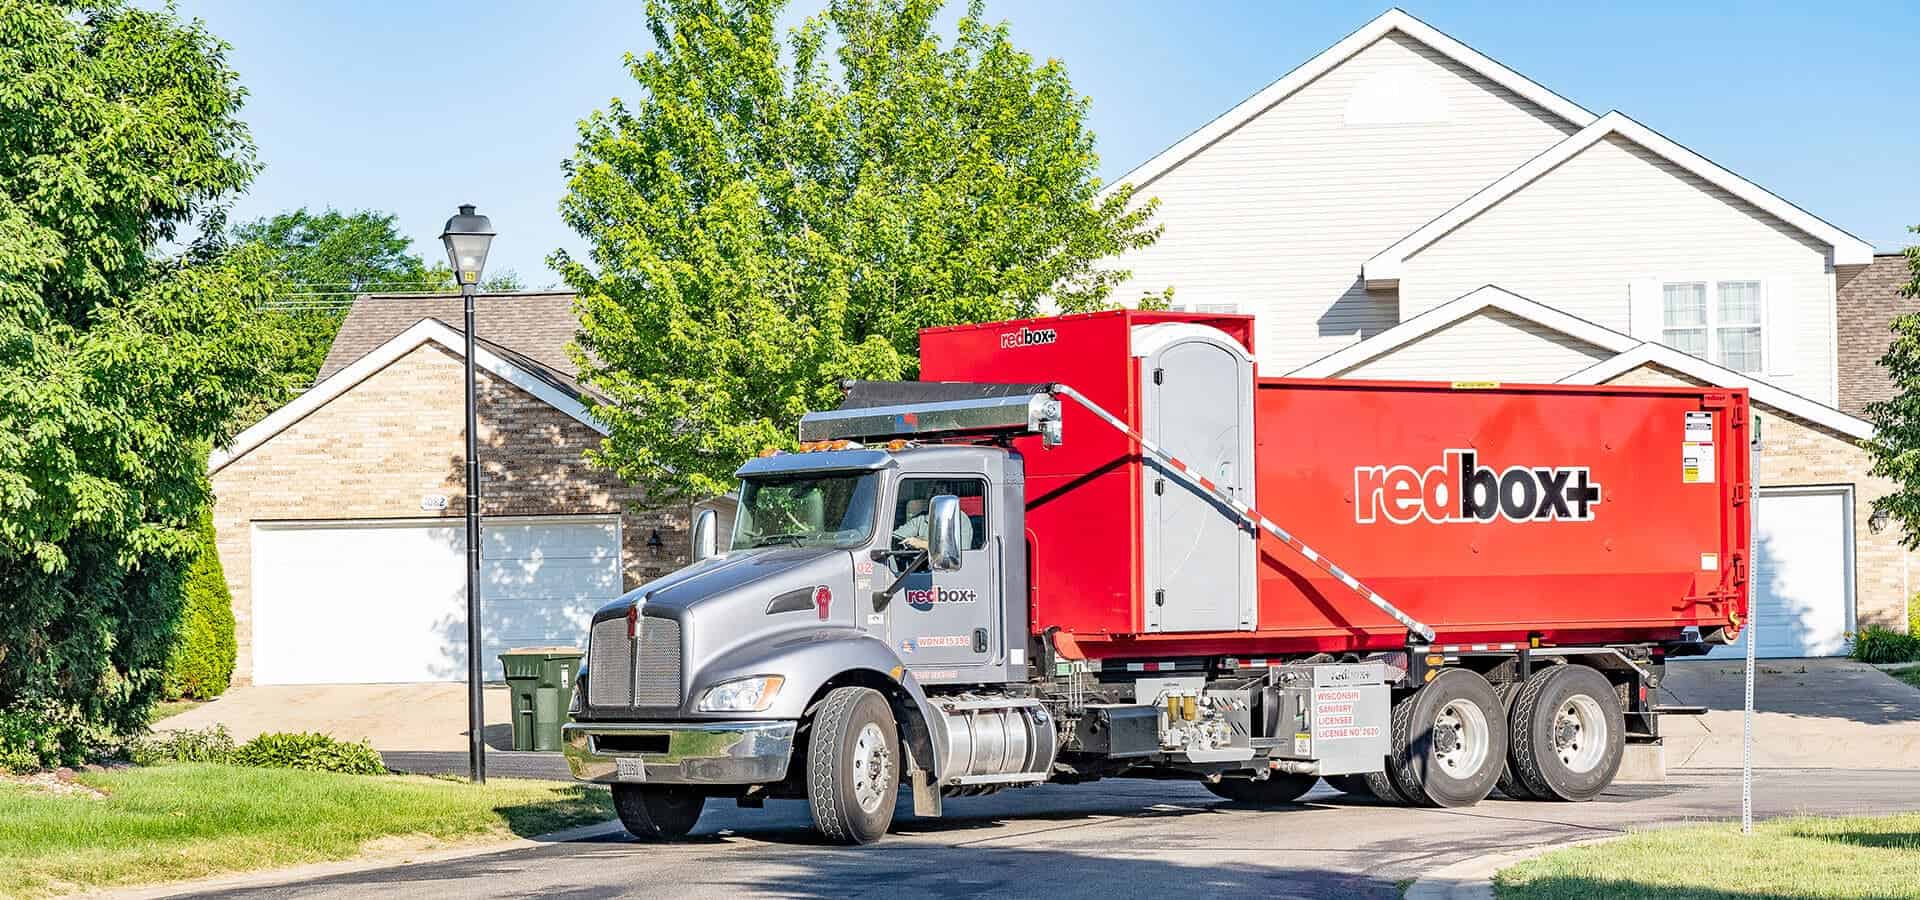
Tip No. 5: Rent a roll-off dumpster from redbox+ Dumpsters
Save yourself time and stress over waste and debris removal by renting a dumpster. No need to worry about where to take it all; call redbox+ Dumpsters, receive your rental within 24 hours, and contact us when it’s ready to be emptied. If you have any contractors or even friends helping, you can keep dust and debris out of the rest of your home by finding a portable toilet rental near you. redbox+ Dumpsters makes it convenient, as we offer roll-off dumpsters with portable toilets attached to them (see “The Elite” container). We’ll take care of both cleanups so that you can focus on your DIY basement finish project.
Contact us when you’re ready to begin planning your DIY basement refinishing or call 1-844-2-REDBOX.